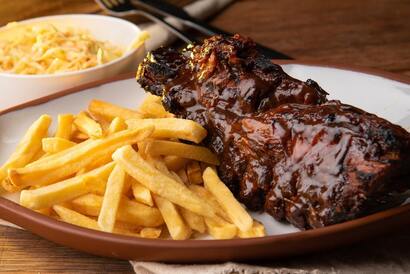
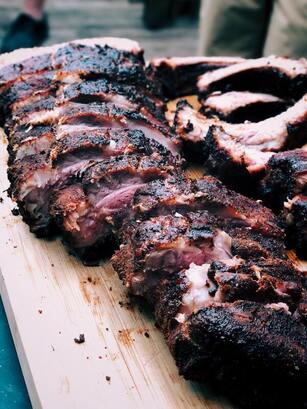
If you have ever seen barbecue being made however, you probably know it is also a labor of love to do it well. Unfortunately, I don’t have somewhere I can set up a smoker, spend hours feeding wood into it, and constantly monitor it to make sure the temperature stays just right. No, I have an apartment in the city and not even a balcony at the moment.
This got me thinking however - how can I make delicious barbecue ribs at home in my apartment kitchen? Well, after much reading, experimenting, and asking actual pitmasters, I think I have found a way to make some darn good barbecue baby back ribs at home using just your oven. Yup, no barrel smoker, no Big Green Egg, no tending a fire for 8+ hours - just the magic fire box already in your kitchen. Sound intriguing?
Let’s dive in.
Before barbecue enthusiasts and masters start pouring in with comments - I must say that oven ribs will never be quite like “true” slow smoked barbecue ribs. The slow cooking process, smoke, and more do truly unique and magical things you just can’t quite mimic in a home kitchen. No, what we’re going to try and do is mimic the conditions of true barbecue at home and get most of the way there. So what are those conditions? Temperature and Smoke.
Temperature:
If you are like me, you don’t have a smoker or even a grill which you can use for nearly a full waking day, let alone the personal time to tend a live fire. Luckily, you have a machine in your kitchen that can help manage a lot of the hands-on work of maintaining a steady, low temperature perfect to make ribs tender and delicious - your oven.
Maintaining a steady, low temperature will be critical to help cook the ribs, break down connective tissue, and make the meat that perfect combo of fall apart tender and moist which you look for in ribs. And unlike tending a live fire for hours which takes some time to master - your oven will maintain a (relatively) consistent temperature all on its own. So part 1 on managing temperature? Check.
Smoke:
This will be a little more tricky - as you can imagine, smoke is not something you probably want in the great indoors of your home, so how can you get that fresh from the smoker flavour without risking your lease deposit?
The easiest way to get smoke flavor is via the sauce. Many barbecue sauces have some level of smoke flavor already in them - if you like hickory smoke flavor, you can likely find a hickory version of most barbecue sauce brands out there. Just note that going the sauce only route will likely lead to a milder smoke flavor overall.
Another option is to introduce smoke flavor via a rub you massage and coat the ribs with prior to cooking. Smoked Paprika is an easy way to get a smoky flavour into your ribs, and many pre-made rubs include it already. In whatever rub you use, adding a tablespoon of smoked paprika per rack of ribs can get you some of that fresh from the smoker flavor.
A final option is liquid smoke. You can add a very small amount to your barbecue sauce to help amp up the smoke flavor. While many barbecue masters will turn their nose up at this, I'm not above it.
Now that we know what we’re trying to replicate, let’s discuss prepping your ribs to cook.
There are three things I recommend prior to cooking your ribs to make them as easy to eat and delicious as possible.
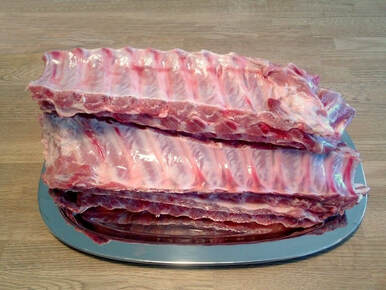
Step 1: Remove the membrane from the concave bone side of the ribs. This can get tough and chewy during cooking, so getting rid of it key. Here’s a good 2-minute video showing how.
Step 2: Dry your ribs before seasoning. Use paper towels to pat dry the surface of your ribs before you start seasoning - this will help make sure everything sticks to the meat.
Step 3: Season your ribs generously. Since we will be cooking ribs in two steps (more on that in just a second), you have lots of time to get flavor deep into the meat. Don’t be shy about using a generous amount of rub or seasoning before cooking.
I use a two-step cooking process when making ribs at home, one to slowly cook and tenderize the meat in the ribs, and the second to help create that sticky, saucy layer and beautiful glaze. Don’t let that two-step part put you off - it’s truly really easy.
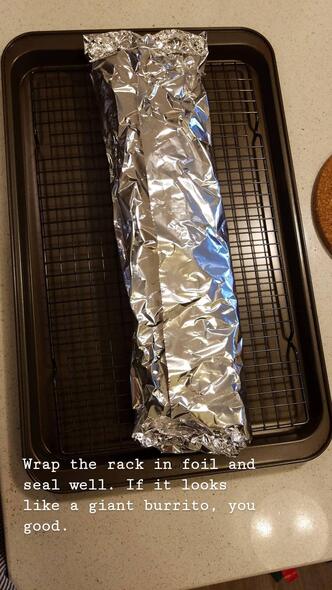
Step one of cooking is to create a moist environment which will help tenderize the meat over the course of a few hours - and the best way to do that I’ve found is creating a foil pouch for the ribs.
To do this, wrap your ribs tightly during the first part of cooking in one large piece of aluminum foil to trap any drippings, juice, and moisture. This moist environment will mimic braising - think making pot roast or pulled pork in a slow cooker - and tenderize the meat. This process is not quick, but the low and slow preparation will take you one step closer to the pull-apart tenderness you are after.
Part 2 - Caramelizing the glaze
After the ribs have cooked low and slow, you will then turn your attention to creating a sticky barbecue sauce glaze on the outside of your ribs. This will also happen in the oven and takes much less time than the first step of cooking the ribs.
First, remove the ribs from the foil pouch and put them onto a rack over a baking sheet - the rack will help with extra air circulation and help make sure the sauce caramelizes and also adheres to the ribs as it reduces and gets sticky.
Next, brush your favorite sauce onto the ribs generously and cook it for at least another 30 minutes. At the end of the 30 minutes, you can call it a day and serve your ribs as-is. However, if you want to go the extra mile, I recommend giving your ribs one more extra layer of sauce and quickly broiling them to caramelize it just a little bit.
Wrap Up and a Recipe:
There we go - that’s all there really is to it. Making tender, fall apart ribs at home is easier than you may think, even if all you have is a small oven and a cramped apartment kitchen. Just remember to:
- Prep and dry your ribs before seasoning and cooking
- Season your ribs well and cook low and slow in a moist environment to start
- Coat ribs well with your favorite sauce and give it time to caramelize and stick to the meat
- Have plenty of napkins on hand for the inevitable mess to come
Serves: 2-3
Time: 3.5-4 hours
Ingredients:
- 1 Rack Baby Back Ribs - Approximately 2 lbs
- 3 Tablespoons of your favorite BBQ dry rub
- Feel free to make your own. I used Penzey’s BBQ 3000 with an added 1 teaspoon of cumin and 2 tablespoons of brown sugar
- 1 Cup of your favorite barbecue sauce - I used Sweet Baby Ray’s original
Directions:
- Dry your ribs with paper towels and remove the membrane on the concave side of the ribs
- Season both sides of the ribs generously with your dry rub - massage it so it sticks to the meat
- Wrap your ribs in a large, single piece of aluminum foil - fold the foil over the ribs so it completely wraps the ribs and will not leak
- Place your wrapped ribs on a baking sheet to catch any potential leakes
- Cook your ribs in a 275 degree oven for at least 2.5 hours. Go a full 3 hours if you have the time
- Carefully open and remove the ribs from the foil pouch and place them directly on a wire rack over a baking sheet
- Coat the ribs with your favorite barbecue sauce using a brush - place it back in the 275 degree oven for 30 minutes
- Remove your ribs from the oven and give your ribs one more coat of your favorite barbecue sauce
- Preheat your oven’s broiler on low
- Broil your ribs 5-6 inches away from the broiler for 3-5 minutes until the sauce is bubbling and caramelizing - watch carefully; you don’t want it to burn
- Remove and serve with your favorite sides and plenty of napkins
Enjoy Y'all!


