Before refrigeration was common, pickling was a popular method to preserve food long into the cold, dark winters. You know, way back in the day when we didn't have central heating and keeping warm meant playing Spoon-Drawer with your family under two layers of jackets and wool sheets rough enough to exfoliate three layers of skin off? Yeah, aren't you happy we live in an age where heating is abundant and you can read this in the comfort of your Patagonia quarter zip on your Macbook Pro?
Anyways....pickling. It's become a bit of a lost art. I can guarantee that many of your grandparents have gone through a few rounds of canning, pickling, and preserving in their lifetimes. It would a summer and autumn rite of passage to fill up your shelves with jars on jars of vegetables, fruit, and more of ready to crack open goodness. As a practice, it makes sense; preserve food from when it's freshest and then you to enjoy them months later. Nowadays, pickling still works its preservation magic like it always has, but many enjoy pickles for their flavour more than its longevity extending ability. The zesty tang of pickled food is also conveniently very easy to do at home. It's also a cheap, easy way to make food more exciting in the winters. Sound like something you want to try out? Alright, let's begin.
Anyways....pickling. It's become a bit of a lost art. I can guarantee that many of your grandparents have gone through a few rounds of canning, pickling, and preserving in their lifetimes. It would a summer and autumn rite of passage to fill up your shelves with jars on jars of vegetables, fruit, and more of ready to crack open goodness. As a practice, it makes sense; preserve food from when it's freshest and then you to enjoy them months later. Nowadays, pickling still works its preservation magic like it always has, but many enjoy pickles for their flavour more than its longevity extending ability. The zesty tang of pickled food is also conveniently very easy to do at home. It's also a cheap, easy way to make food more exciting in the winters. Sound like something you want to try out? Alright, let's begin.
First let's get some definitions and baselines set. What, first of all, is a pickle?
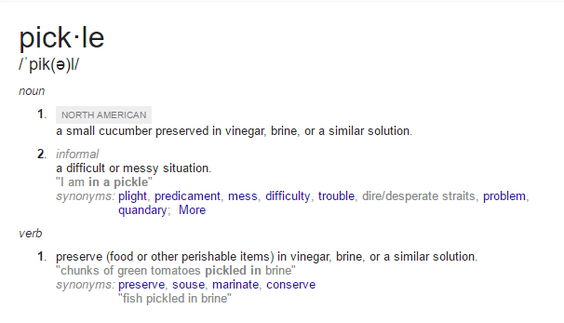
We're focusing on the "Vegetable preserved in vinegar or brine" definition here. It's important to know that there are two main ways to make pickles. The quick method is using a vinegar base. Pickles made this way have that up-front tang and can be made and eaten in the same day. For that speed, however, you sacrifice some complexity in flavour and also beneficial probiotics, which you probably have heard of enough times in Activia Commercials. Probiotics can help do all sorts of good things to your insides so people are flipping a s#it over it (long story short, it makes you poop better). Those benefits come with the other method of pickling - fermenting. Pickles made this way skip the vinegar and instead allow salt and time to naturally break down your vegetables and preserve them via fermentation. Good bacteria break down sugars and create lactic acid - preserving the food and giving fermented pickles, like kimchi, that characteristic tang and often prized "funk" factor. Fermentation is the traditional pickling method and is making a resurgence recently, especially as probiotics are the new Kale and everyone is in love with them.
So why am I giving you a history lesson on pickles? Well, because I figured it would be interesting to the few who care about that kind of stuff and also because I worked for a pickling startup back in the day here in the DC area. (Shout out to Number 1 Sons!). They taught me a lot about naturally fermented pickles and made me appreciate the art of food preservation a bit more.
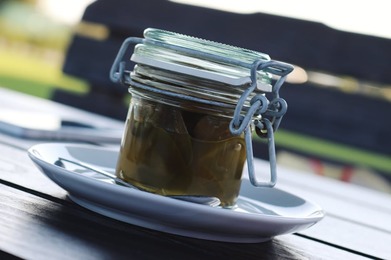
In this post, we will be focusing on the vinegar method of pickling. It's easier for most and still makes some darn tasty pickles. So what equipment do you need? Well, not much. All you really need a well cleaned and disinfected glass jar and a small sauce pan. I'm sure somewhere in your fridge is an old Jam Jar or maybe even a near empty pickle jar. I will go ahead and volunteer one of those as tribute for you.
So why am I giving you a history lesson on pickles? Well, because I figured it would be interesting to the few who care about that kind of stuff and also because I worked for a pickling startup back in the day here in the DC area. (Shout out to Number 1 Sons!). They taught me a lot about naturally fermented pickles and made me appreciate the art of food preservation a bit more.
In this post, we will be focusing on the vinegar method of pickling. It's easier for most and still makes some darn tasty pickles. So what equipment do you need? Well, not much. All you really need a well cleaned and disinfected glass jar and a small sauce pan. I'm sure somewhere in your fridge is an old Jam Jar or maybe even a near empty pickle jar. I will go ahead and volunteer one of those as tribute for you.
The Veg
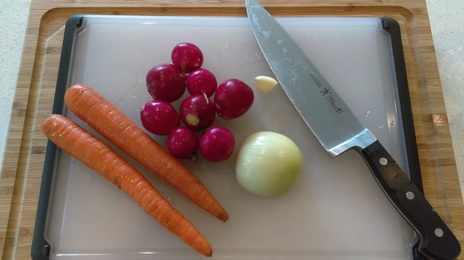
Firm, crispy vegetables lend themselves to pickling better than soft veggies, so stick to things like:
- Carrot
- Cucumber
- Onion
- Radish
- Turnip
- Celery
- Peppers
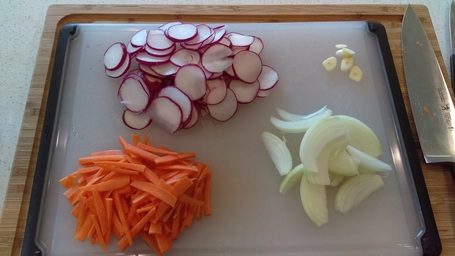
The key is when prepping these vegetables, you want to cut them down to relatively the same size. This makes sure they will pickle be ready to eat at roughly the same time. Also keep in mind that a smaller sized cut means they will pickle and be ready faster than large chunks, which can take days to be ready vs hours. If you're following my example in the pics, I was making some spicy-sweet pickles for a taco night so I sliced my veggies pretty thin.
The Pickling Solution:
After you prep veg, next you want to turn your attention to the pickling solution. You may be thinking, "Can't I just dump vinegar on my veggies and be done?"
The Pickling Solution:
After you prep veg, next you want to turn your attention to the pickling solution. You may be thinking, "Can't I just dump vinegar on my veggies and be done?"

If you want to make something edible and not relive that time when you were 3 and your older brother tricked you into eating Extra Sour Warheads, you need to realize there is much more to a pickling mix than straight vinegar. In any pickling mix, you need to balance three main flavours:
Imagine these three as three pillars holding up your house. You need to make sure one isn't overpowering or overshadowing the others less you want the whole thing to start crumbling down. Vinegar will provide the sour here, but your job as the chef is to introduce the salt and sugar in the right amounts to achieve something tasty.
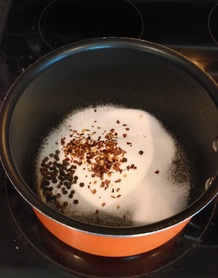
First consider what you're looking for. So you want a sour-salty pickle to eat with sandwiches? Or a sweet and tangy pickle for a relish? Taste your pickling solution after it comes to a boil and see if the flavour profile is what you are looking for. After you nail the base flavours you can add in your other side seasonings like pepper, herbs, and more. Here I am making a spicy and slightly sweet pickle to go with tacos, so I used a fair amount of sugar and some red pepper flake and garlic. Also note, I added extra water to the mix to dilute the vinegar to even cut back the sour hit. Vinegar all on its own will be too pungent so we need to cut it back.
- Sour
- Salty
- Sweet
Imagine these three as three pillars holding up your house. You need to make sure one isn't overpowering or overshadowing the others less you want the whole thing to start crumbling down. Vinegar will provide the sour here, but your job as the chef is to introduce the salt and sugar in the right amounts to achieve something tasty.
First consider what you're looking for. So you want a sour-salty pickle to eat with sandwiches? Or a sweet and tangy pickle for a relish? Taste your pickling solution after it comes to a boil and see if the flavour profile is what you are looking for. After you nail the base flavours you can add in your other side seasonings like pepper, herbs, and more. Here I am making a spicy and slightly sweet pickle to go with tacos, so I used a fair amount of sugar and some red pepper flake and garlic. Also note, I added extra water to the mix to dilute the vinegar to even cut back the sour hit. Vinegar all on its own will be too pungent so we need to cut it back.
There in spirit: Vinegar and Water
'So in my pot, I combined:
This is for a 16oz jar of pickles. There is no hard and fast ratio of water to vinegar to the other ingredients; it is more up to personal preference. The mix above though made for a tangy and mildly spicy pickle that went great with carnitas. Not too sour, not too sweet, but bright enough to wake up fatty, slow-braised pork. Taste the mix as it heats up (don't burn yourself) and add salt, vinegar, and water to taste.
When making your pickling mix, you want to combine all your liquids and seasonings in a small pot and heat over medium-high heat until boiling. Boil for about 1 minute then turn off the heat and let it sit covered for about 5 minutes to cool slightly.
- 1 cup apple cider vinegar
- 1/2 cup water
- 1 tsp salt
- 1/3 cup sugar
- 1/2 tsp black peppercorns
- heavy pinch red pepper flake
This is for a 16oz jar of pickles. There is no hard and fast ratio of water to vinegar to the other ingredients; it is more up to personal preference. The mix above though made for a tangy and mildly spicy pickle that went great with carnitas. Not too sour, not too sweet, but bright enough to wake up fatty, slow-braised pork. Taste the mix as it heats up (don't burn yourself) and add salt, vinegar, and water to taste.
When making your pickling mix, you want to combine all your liquids and seasonings in a small pot and heat over medium-high heat until boiling. Boil for about 1 minute then turn off the heat and let it sit covered for about 5 minutes to cool slightly.
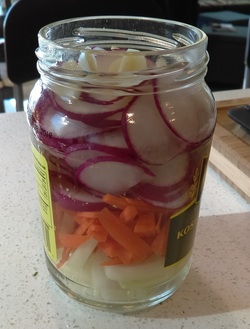
As it cools, it would be a good time to pack your vegetables into your clean and sanitized jar. In the many years I have made pickles and jams, I have found that a thorough washing in the dishwasher or with HOT soapy water is enough to keep mold and any bad bacteria from contaminating your pickles. This step is important. You don't want stray bacteria getting into your food and making you sick later. Pack your vegetables in any order (or disorder) you would like.
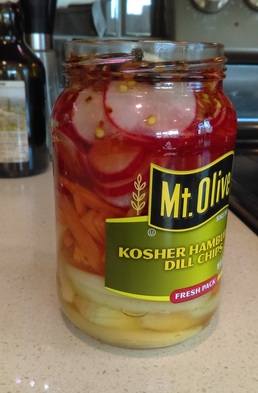
After your jars are packed a ready, carefully pour your pickling liquid over your vegetables (peppercorns, seasonings, and all) until covered, leaving a small gap at the top of the jar. Loosely cover the jar and let it cool on the counter for about 30 minutes before tightening and moving it to the fridge. At this point, the only remaining ingredient is time. I would strongly recommend letting your pickles sit in the fridge at least 6-8 hours before eating. Overnight would be even better. This will give time for the flavours to be absorbed by the veggies and mix and mingle.
Serving:
So you've made your pickles you crafty mother trucker you. Now what do you do with it? Well you have many options. Serve it as a side to sandwiches like you would regular cucumber pickles, put it in sandwiches, serve it with main courses as a side or garnish, or channel your inner pregnant lady and just eat it out of the jar with a fork or over ice cream. I'm not our mother so the sky's the limit.
The Recipe:
Did y'all think I would make you scroll all over the page to get the recipe for those taco pickles? Here it is in one place:
Sweet and Spicy Pickled Vegetables
Makes: 1 16 oz. jar
Ingredients:
Pickling Solution:
Preparation:
I hope this inspired you to try out your hand at pickling this winter. In a season when everything is either pumpkin spice, eggnog, and peppermint flavoured or is heavy and hearty, bright and zesty pickles can add some spice to your meals. Cheers y'all.
Makes: 1 16 oz. jar
Ingredients:
- 2 carrots thinly julienned
- Half yellow onion cut into wedges
- 8-10 radishes, thinly sliced
- 1 clove garlic, sliced
Pickling Solution:
- 1 cup apple cider vinegar
- 1/2 cup water
- 1 tsp salt
- 1/3 cup sugar
- 1/2 tsp black peppercorns
- heavy pinch red pepper flake
Preparation:
- In a small pot, heat ingredients of the pickling solution to a boil over medium-high heat.
- Boil mixture for 1 minute and then cover and turn off the heat
- Pack your cut veggies in your clean glass jar. It may not all fit, but get as much as you can into the jar while still leaving some space at the top of the jar.
- Pour the hot pickling solution over the vegetables and fill until just shy of the top of the jar
- Loosely cover the jar and cool on the counter for 30 minutes before transferring to the fridge
- Let it pickle for at least 6-8 hours before serving, overnight would be even better. Stored in the fridge, pickles will last 3-4 weeks or until all consumed, whichever comes first.
I hope this inspired you to try out your hand at pickling this winter. In a season when everything is either pumpkin spice, eggnog, and peppermint flavoured or is heavy and hearty, bright and zesty pickles can add some spice to your meals. Cheers y'all.
